The Ultimate Arch Linux
A comprehensive guide to installing and configuring Arch Linux with Hyprland, NVIDIA drivers, gaming optimization, and modern tooling. Learn from real experience, not just theory.
Look, there's something special about Arch. Not because of the memes (though let's be honest, "I use Arch btw" never gets old), but because when you build it yourself, you actually understand every piece of your system. No mystery packages, no bloat you didn't ask for, just pure Linux exactly how you want it.
This guide walks through setting up the Arch Linux gaming and development rig, and all the modern tooling that makes 2026 the best time to be on Linux.
What Makes This Setup Special?
Hyprland — Wayland compositor that's stupid fast, gorgeous, and endlessly customizable. Tiling window management that actually makes sense.
NVIDIA + Wayland — Plot twist: it works now. Like, really works. No screen tearing, native Wayland performance, the whole nine yards.
Modern CLI Tools — Fish shell, Starship prompt, Zoxide, EZA. The terminal experience you didn't know you needed.
Reproducible Everything — Dotfiles managed with chezmoi and version controlled. Reinstall anytime, back up and running in minutes.
The Hardware
- CPU: Intel i9-11900K
- GPU: NVIDIA RTX 4080 SUPER
- RAM: 32GB
- Storage: NVMe SSD with Btrfs
- Display: 3440x1440 ultrawide
Your hardware will probably differ, but the principles apply universally. This isn't a "you must have exactly this" situation.
The Philosophy
This guide isn't just a command dump. It's built around three principles:
- Understanding — Know why you're doing something, not just what to type
- Practicality — Real solutions that actually work in daily use
- Maintainability — A setup you can manage long-term without pulling your hair out
Let's build something awesome.
The Foundation: Bootloader Choice
Before diving in, let's talk bootloaders. This choice matters more than you'd think.
systemd-boot vs GRUB
I'm going with systemd-boot, and here's why:
- Lightning-fast boot times (we're talking seconds)
- Dead simple config files (no arcane GRUB syntax)
- UEFI-native (it's 2026, folks)
- Tiny footprint (~1MB vs GRUB's bloat)
- No regeneration headaches after kernel updates
Stick with GRUB if:
- You need legacy BIOS support
- You want fancy graphical themes
- You need encrypted
/boot - You're dual-booting with complex setups
For a modern UEFI system running Arch (maybe with Windows on the side), systemd-boot is the clear winner.
The Installation
Using archinstall isn't cheating—it's smart. It handles the tedious stuff while giving you full control.
Boot the ISO
- Grab the latest Arch ISO
- Flash it to USB (
ddor balenaEtcher) - Boot from USB
- Connect to internet (ethernet just works™)
WiFi? No problem:
# Enter the interactive shell
iwctl

# List your devices (look for wlan0 or similar)
device list

# Scan for networks
station wlan0 scan

# Connect to your network
station wlan0 connect "YourNetwork"
Fire Up the Installer
# Update package database first to get the latest archinstall
pacman -Sy archinstall

# Launch the guided installer
archinstall
Now for the fun part—configuration choices that actually matter.
My Configuration
Disk Setup
Filesystem: Btrfs with subvolumes
Why? Snapshots. One bad pacman -Syu and you can roll back in seconds. It's saved me more times than I can count.
Subvolumes:
@→/@home→/home@log→/var/log@pkg→/var/cache/pacman/pkg
Snapshots: Enable Snapper
Pro tip: Enable disk encryption if you're paranoid (or just smart about security).
Swap: ZRAM
Compressed swap in RAM. Sounds weird, works amazingly. Way faster than disk swap, perfect for gaming.
- Type: ZRAM
- Compression: zstd
Kernel
linux-zen — Optimized for desktop/gaming with better scheduler tuning. Why settle for the vanilla kernel when zen exists?
User Setup
Set a strong root password, create your user account with sudo permissions. Standard stuff.
Desktop Profile
- Profile: Desktop
- DE: Hyprland (select
polkitfor seat access) - Graphics: Pick the NVIDIA open kernel driver
- Greeter: SDDM
Network
NetworkManager with iwd backend. Modern, reliable, just works.
Audio
PipeWire — The only choice in 2026. JACK compatibility, PulseAudio compatibility, actually good Bluetooth audio. What's not to love?
Extra Packages
# Essential extras for building packages and system stability
intel-ucode base-devel git vim
intel-ucode is critical for CPU stability and security. Don't skip it.
Let It Cook
Hit install and grab coffee. The installer will:
- Partition your disk
- Install base system
- Configure systemd-boot
- Set up users and services
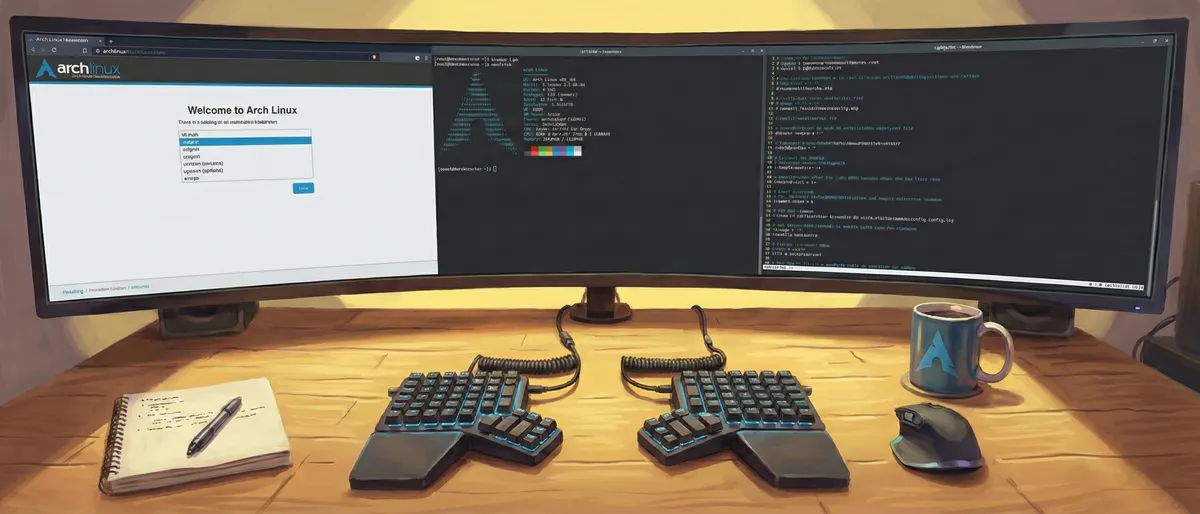
First Boot
Remove the USB, reboot, and you'll see the SDDM login screen. Welcome to Hyprland.
Initial Setup
First things first—update everything and configure pacman:
Note: To open terminal press "Super + Q". Default by hyprland
# 1. Optimize mirrors for speed
sudo curl -o /etc/pacman.d/mirrorlist https://archlinux.org/mirrorlist/all/https/

# 2. Enable Parallel Downloads for faster updates
# Finds the #ParallelDownloads line and edit by setting the value to 10
sudo vim/etc/pacman.conf

# 3. Enable multilib (32-bit support) - Critical for Steam/Gaming
# Uncomments the [multilib] section in pacman.conf
sudo vim /etc/pacman.conf

# 4. Full system update with new config
sudo pacman -Syyu
AUR Helper: Paru
We use paru as our AUR helper. It's written in Rust, fast, and great.
# Ensure base-devel is installed
sudo pacman -S --needed base-devel

# Clone and build paru
git clone https://aur.archlinux.org/paru.git
cd paru
makepkg -si

# Cleanup
cd ..
rm -rf paru
Now you can install AUR packages with paru -S package-name.
Foundation laid. Time to make it awesome.
The next section covers NVIDIA driver setup for Wayland. This is essential for proper graphics performance. Take your time and follow each step carefully.
NVIDIA + Wayland: It Actually Works Now
Remember when NVIDIA on Wayland was a meme? "Just use AMD" they said. "Wayland will never work" they said. Well, plot twist: it works beautifully now. Here's how to set it up properly.
Install the Drivers
Since we're on linux-zen (or any custom kernel), we need DKMS drivers:
# Install NVIDIA driver stack, utilities, and Wayland support
# nvidia-open-dkms: Modern open kernel modules (required for linux-zen)
# nvidia-utils: Core OpenGL/Vulkan libs
# lib32-nvidia-utils: 32-bit support (CRITICAL for gaming/Wine)
# egl-wayland: The bridge that makes Wayland work
sudo pacman -S nvidia-open-dkms nvidia-utils lib32-nvidia-utils nvidia-settings egl-wayland
What you're getting:
nvidia-open-dkms— Kernel module that rebuilds automaticallynvidia-utils— OpenGL/Vulkan librarieslib32-nvidia-utils— 32-bit support (gaming essential)nvidia-settings— GUI config tool (optional but useful)egl-wayland— Bridges NVIDIA's EGL to Wayland
Configure Early Loading
Time to edit mkinitcpio.conf. We need NVIDIA modules loaded early:
sudo nvim /etc/mkinitcpio.confAdd to MODULES array:
# /etc/mkinitcpio.conf

# If you have Intel iGPU (like i9-11900K) + NVIDIA:
MODULES=(i915 nvidia nvidia_modeset nvidia_uvm nvidia_drm)

# OR if you have NVIDIA only:
# MODULES=(nvidia nvidia_modeset nvidia_uvm nvidia_drm)
Remove kms from HOOKS:
# /etc/mkinitcpio.conf

# Find the HOOKS line and REMOVE 'kms'
# Before: HOOKS=(base udev autodetect modconf kms keyboard ...)
# After:
HOOKS=(base udev autodetect modconf keyboard ...)
Why? NVIDIA handles KMS itself. Having both causes conflicts.
Rebuild initramfs:
# Apply changes to initramfs
sudo mkinitcpio -P
Enable DRM Kernel Modesetting
Edit your systemd-boot entry to enable DRM modesetting:
# Edit your loader config (usually arch.conf or similar)
sudo nvim /boot/loader/entries/$(ls /boot/loader/entries/ | grep arch | head -n 1)
Add these kernel parameters to the options line:
# In your boot loader file (e.g., /boot/loader/entries/arch.conf)
# Append these to the existing options line:
nvidia_drm.modeset=1 nvidia_drm.fbdev=1

# Example full options line:
# options root=PARTUUID=xxxx-xxxx rw nvidia_drm.modeset=1 nvidia_drm.fbdev=1
What these do:
nvidia_drm.modeset=1— Enables Wayland support (the magic flag)nvidia_drm.fbdev=1— High-res TTY (nice bonus)
Enable Power Management
# Enable NVIDIA suspend/resume services to prevent sleep issues
sudo systemctl enable nvidia-suspend.service nvidia-hibernate.service nvidia-resume.service
Reboot and Verify
sudo rebootAfter reboot, verify DRM modesetting is active:
# Check if modeset is enabled (Should output 'Y')
cat /sys/module/nvidia_drm/parameters/modeset
If you see Y, congrats! NVIDIA is ready for Wayland.
Hyprland NVIDIA Configuration
Now configure Hyprland to actually use the GPU. Edit your Hyprland config:
nvim ~/.config/hypr/hyprland.confAdd these environment variables at the top:
# ~/.config/hypr/hyprland.conf

# --- NVIDIA SPECIFIC VARS ---
# Force GBM backend (crucial for NVIDIA)
env = GBM_BACKEND,nvidia-drm
# Hardware video decode
env = LIBVA_DRIVER_NAME,nvidia
# Force OpenGL to use NVIDIA library
env = __GLX_VENDOR_LIBRARY_NAME,nvidia
Hardware Video Acceleration
Install VA-API drivers for hardware video decode:
sudo pacman -S libva-nvidia-driver libva-utilsAdd to hyprland.conf:
# Enable direct VA-API backend
env = NVD_BACKEND,direct
Test it:
# Check VA-API status
vainfo
You should see your RTX GPU listed. If you do, hardware acceleration is working.
Browser & Media Player Setup
Firefox — Enable hardware decode in about:config:
media.hardware-video-decoding.force-enabled = trueMPV — Create/edit ~/.config/mpv/mpv.conf:
# ~/.config/mpv/mpv.conf
hwdec=auto
Optional G-Sync — Add to hyprland.conf if you have a G-Sync monitor:
# Allow tearing for G-Sync/FreeSync
env = __GL_GSYNC_ALLOWED,1
Troubleshooting
If something's not working:
# Check monitor detection
hyprctl monitors

# Check GPU usage
nvidia-smi

# Monitor performance
nvtop
The Result
NVIDIA on Wayland is now fully configured. No screen tearing, native Wayland performance, hardware acceleration working. It's 2026—NVIDIA finally plays nice with Wayland.
Building Your Hyprland Desktop
Unlike GNOME or KDE where everything's included, Hyprland is a compositor—you build the desktop experience yourself. Think of it as Linux LEGO.
The Hyprland Ecosystem
# Core Hyprland components
# xdg-desktop-portal-hyprland: Essential for screensharing/obs
# qt6-wayland/qt5-wayland: Qt apps compatibility
sudo pacman -S hyprland xdg-desktop-portal-hyprland \
  hyprpaper hypridle hyprlock hyprcursor hyprpicker \
  xdg-utils qt6-wayland qt5-wayland
What you're installing:
hyprpaper— Wallpaper managerhypridle— Auto-lock when you're AFKhyprlock— Screen lockerhyprcursor— Cursor themeshyprpicker— Color picker (super handy)
Terminal: Kitty
GPU-accelerated, Wayland-native, stupid fast:
# Install Kitty
sudo pacman -S kitty

# Create config directory if it doesn't exist
mkdir -p ~/.config/kitty

# Basic high-performance config
cat <<EOF > ~/.config/kitty/kitty.conf
font_family JetBrainsMono Nerd Font
font_size 11.0
enable_audio_bell no
window_padding_width 8
background_opacity 0.95
EOF
App Launcher: Fuzzel
Wofi is fine, but Fuzzel is faster and cleaner:
# Install Fuzzel
sudo pacman -S fuzzel
Add to Hyprland config:
# ~/.config/hypr/hyprland.conf
bind = SUPER, SPACE, exec, fuzzel
Screenshots
# grim: screenshot tool
# slurp: region selector
# wl-clipboard: clipboard utility
sudo pacman -S grim slurp wl-clipboard
Bind it in Hyprland:
# ~/.config/hypr/hyprland.conf
# Print Screen: Select area -> Copy to clipboard
bind = , PRINT, exec, grim -g "$(slurp)" - | wl-copy
Clipboard Manager
sudo pacman -S cliphistAdd to hyprland.conf:
# Enable clipboard history
exec-once = wl-paste --type text --watch cliphist store
exec-once = wl-paste --type image --watch cliphist store

# Bind: Super+V -> Open history with Fuzzel
bind = SUPER, V, exec, cliphist list | fuzzel --dmenu | cliphist decode | wl-copy
File Manager: YAZI
Terminal file manager with image previews. Blazing fast:
# Install Yazi and dependencies for previews
# ffmpeg: video thumbnails
# jq/poppler/fd/ripgrep: faster search/processing
# imagemagick: image previews
sudo pacman -S yazi ffmpeg 7zip jq poppler fd ripgrep fzf zoxide resvg imagemagick
Polkit Agent
For GUI password prompts (like when you open GParted):
sudo pacman -S polkit-kde-agentAdd to hyprland.conf:
exec-once = /usr/lib/polkit-kde-authentication-agent-1QuickShell (System UI)
QML-based status bar and widgets. Incredibly flexible:
paru -S quickshell-git
sudo pacman -S qt6-5compat qt6-positioning qt6-location
Essential Services
Bluetooth & Audio:
# Install Bluetooth stack and applet
sudo pacman -S bluez bluez-libs blueman
sudo systemctl enable --now bluetooth

# Install PipeWire (Audio) suite
# pipewire-pulse: Drop-in replacement for PulseAudio
# wireplumber: Session manager
sudo pacman -S pipewire pipewire-pulse wireplumber pipewire-audio pipewire-alsa pipewire-jack
sudo pacman -S playerctl  # Media controls
Check audio status:
wpctl statusBluetooth audio fix (prevent auto-switch to headset profile):
wpctl settings --save bluetooth.autoswitch-to-headset-profile falseFonts
# 1. Install Core Fonts
sudo pacman -S noto-fonts noto-fonts-cjk noto-fonts-emoji noto-fonts-extra \
  ttf-jetbrains-mono-nerd ttf-liberation ttf-dejavu ttf-roboto ttf-fira-code

# 2. Install Icon Fonts
paru -S ttf-material-symbols-variable
sudo pacman -S ttf-font-awesome

# 3. Rebuild Font Cache
fc-cache -fv
Cursor & GTK Themes
# Install themes
paru -S bibata-cursor-theme-bin
sudo pacman -S orchis-theme

# Apply GTK themes globally
gsettings set org.gnome.desktop.interface color-scheme 'prefer-dark'
gsettings set org.gnome.desktop.interface gtk-theme 'Orchis-Dark-Compact'
Add to hyprland.conf to force cursor theme:
env = XCURSOR_THEME,Bibata-Modern-Classic
env = XCURSOR_SIZE,24
Keyboard Layouts
Multiple layouts? Easy. In hyprland.conf:
input {
    kb_layout = us,lt
    kb_options = grp:win_space_toggle
}
Or use a custom bind:
$hyper = SUPER CTRL ALT SHIFT
bind = $hyper, Space, exec, hyprctl switchxkblayout all next
XDG Portals
Create ~/.config/xdg-desktop-portal/portals.conf:
[preferred]
default=hyprland;gtk
Restart portals (Important if screensharing isn't working):
systemctl --user restart xdg-desktop-portal xdg-desktop-portal-hyprland xdg-desktop-portal-gtk
dbus-update-activation-environment --systemd --all
If portals are still broken, nuclear option:
killall -e xdg-desktop-portal-hyprland xdg-desktop-portal xdg-desktop-portal-gtk
/usr/lib/xdg-desktop-portal-hyprland &
sleep 2
/usr/lib/xdg-desktop-portal &
Done!
You now have a fully functional Hyprland desktop that:
- Looks gorgeous
- Performs incredibly well
- Has all the features you'd expect
- Is completely under your control
Next up: applications and gaming optimization.
You now have a functional Hyprland environment. The following sections enhance it with applications, gaming support, and optimizations.
The Apps That Make It Home
Beyond the system essentials, here are the tools that make daily Linux life actually enjoyable.
Browser: Zen Browser
Firefox-based but better. Cleaner UI, better defaults:
paru -S zen-browser-binQuick setup:
- Settings → Privacy & Security → Strict
- Install uBlock Origin, enable ALL filter lists
about:config→gfx.webrender.dcomp-video-hw-overlay-win-force-enabled = true(NVIDIA VSR)about:config→browser.tabs.allow_transparent_browser = false(fix transparency bug)
Shell: Fish & Starship
Bash is fine. Fish is better. Starship makes it beautiful.
# 1. Install Fish and set as default
sudo pacman -S fish
# Add fish to shells list if not present
command -v fish | sudo tee -a /etc/shells
# Change default shell
chsh -s "$(command -v fish)"

# 2. Install Starship prompt & Zoxide
sudo pacman -S starship zoxide

# 3. Configure Fish
# Add init scripts to config
echo "starship init fish | source" >> ~/.config/fish/config.fish
echo "zoxide init fish | source" >> ~/.config/fish/config.fish

# 4. Install EZA (Better ls)
sudo pacman -S eza
Add these aliases to ~/.config/fish/config.fish:
alias ls 'eza --icons'
alias ll 'eza --icons -l'
alias la 'eza --icons -la'
# z project -> cd ~/code/projects/work/current/project
Editor: LazyVim
Neovim, pre-configured, actually usable:
# Install Neovim and Git
sudo pacman -S neovim git

# Clone LazyVim starter template
git clone https://github.com/LazyVim/starter ~/.config/nvim

# Start Neovim (it will install plugins automatically)
nvim
Screen Recording
sudo pacman -S wf-recorder
# Usage: wf-recorder -f output.mp4
Printing
# Install cups and ghostscript
sudo pacman -S cups ghostscript
# Enable and start the service
sudo systemctl enable --now cups
Configure at http://localhost:631
Communication & Documents (Sandboxed)
We use Flatpaks for proprietary or complex apps to keep the base system clean.
# Telegram
flatpak install flathub org.telegram.desktop

# Document Viewers
flatpak install flathub org.gnome.Evince org.gnome.Loupe com.github.tchx84.Flatseal

# Set defaults
xdg-mime default org.gnome.Evince.desktop application/pdf
xdg-mime default org.gnome.Loupe.desktop image/png image/jpeg image/webp
Harden permissions (Review with Flatseal):
# Loupe: Block X11, block arbitrary file access
flatpak override --user org.gnome.Loupe \
  --nosocket=x11 --nosocket=fallback-x11 \
  --nofilesystem=xdg-run/gvfs --nofilesystem=xdg-run/gvfsd

# Evince: Same treatment
flatpak override --user org.gnome.Evince \
  --nosocket=x11 --nosocket=fallback-x11 --nosocket=pulseaudio \
  --nofilesystem=xdg-run/gvfs --nofilesystem=xdg-run/gvfsd
Network: mDNS
For .local domains:
# Install Avahi
sudo pacman -S avahi nss-mdns

# Configure systemd-resolved (disable its mDNS stub)
sudo tee -a /etc/systemd/resolved.conf << EOF
[Resolve]
MulticastDNS=no
LLMNR=no
EOF

# Update nsswitch.conf to interpret .local via mdns_minimal
sudo sed -i 's/^hosts:.*/hosts: mymachines mdns_minimal [NOTFOUND=return] resolve [!UNAVAIL=return] files myhostname dns/' /etc/nsswitch.conf

# Enable Avahi daemon
sudo systemctl enable --now avahi-daemon.service
Firewall: UFW
Essential security:
# Install UFW
sudo pacman -S ufw

# Configure Defaults
sudo ufw --force reset
sudo ufw default deny incoming
sudo ufw default allow outgoing
sudo ufw default deny routed
sudo ufw logging low

# Allow mDNS (Network discovery)
sudo ufw allow 5353/udp comment "mDNS"

# Enable
sudo ufw enable
sudo systemctl enable --now ufw.service
Disable ping response (optional paranoia):
# Drop echo requests in UFW rules
sudo sed -i 's/-A ufw-before-input -p icmp --icmp-type echo-request -j ACCEPT/-A ufw-before-input -p icmp --icmp-type echo-request -j DROP/' /etc/ufw/before.rules
sudo sed -i 's/-A ufw6-before-input -p icmpv6 --icmpv6-type echo-request -j ACCEPT/-A ufw6-before-input -p icmpv6 --icmpv6-type echo-request -j DROP/' /etc/ufw/before6.rules
Mirror Optimization
# Install Reflector
sudo pacman -S reflector

# Configure it (save to /etc/xdg/reflector/reflector.conf)
echo "--protocol https
--latest 25
--sort rate
--save /etc/pacman.d/mirrorlist" | sudo tee /etc/xdg/reflector/reflector.conf

# Enable timer for daily updates
sudo systemctl enable --now reflector.timer
Vimium (Browser Extension)
Keyboard navigation for browsers. Custom mappings:
unmap J
map J nextTab
unmap K
map K previousTab
Equipped
These tools transform the terminal from "necessary evil" to "actually enjoyable". Everything's fast, modern, and makes sense.
Linux Gaming in 2026: It's Actually Good
With NVIDIA configured, Linux gaming is legitimately great. Here's how to optimize for maximum performance.
Steam
Steam
# Install Steam
# Select 'lib32-nvidia-utils' when prompted if you have an NVIDIA GPU
sudo pacman -S steam
Proton setup:
- Settings → Compatibility
- ✅ Enable Steam Play for supported titles
- ✅ Enable Steam Play for all other titles
- Select: Proton Experimental
Proton-GE
GloriousEggroll's custom Proton has game-specific patches vanilla Proton lacks:
# Option 1: Install pre-compiled binary (Recommended)
paru -S proton-ge-custom-bin

# Option 2: GUI Manager (ProtonUp-Qt)
sudo pacman -S protonup-qt
# Usage: Launch ProtonUp-Qt -> Add version -> Select GE-Proton
MangoHud (Performance Overlay)
Like MSI Afterburner but better:
# Install for both 64-bit and 32-bit games
sudo pacman -S mangohud lib32-mangohud
Per-game: Right-click → Properties → Launch Options → mangohud %command%
Config (~/.config/MangoHud/MangoHud.conf):
fps
frame_timing
gpu_stats
cpu_stats
ram
position=top-left
GameMode
Auto-optimizes system for gaming (CPU governor, screensaver inhibition, etc.):
# Install GameMode
sudo pacman -S gamemode lib32-gamemode

# Add user to gamemode group (required)
sudo usermod -aG gamemode $USER
Use: gamemoderun %command% or mangohud gamemoderun %command%
Bottles (Non-Steam Windows Games)
# Install Bottles (Sandboxed)
flatpak install flathub com.usebottles.bottles

# Install needed portal for file access
sudo pacman -S xdg-desktop-portal-gtk
Restart portals (as shown earlier). Bottles handles Wine prefixes beautifully.
Lutris
Multi-store game manager (Epic, GOG, etc.):
sudo pacman -S lutrisSystem Optimizations
VM Max Map Count
Required for some games (like Star Citizen, DayZ):
# Increase memory map limit
echo "vm.max_map_count=2147483642" | sudo tee /etc/sysctl.d/99-gaming.conf

# Apply immediately
sudo sysctl --system
CPU Governor
Max performance (uses more power):
# Install cpupower
sudo pacman -S cpupower

# Set governor to performance
sudo cpupower frequency-set -g performance
sudo systemctl enable cpupower.service
Edit /etc/default/cpupower to make it persistent:
# /etc/default/cpupower
# Uncomment and set:
governor='performance'
I keep it on powersave normally, switch to performance for gaming.
Fan Control
Critical for temps:
# Install tools
paru -S coolercontrol
sudo pacman -S liquidctl

# Enable daemon
sudo systemctl enable --now coolercontrold
Launch GUI, configure fan curves.
Monitoring
# nvtop: GPU monitoring (like htop but for graphics)
# btop: System resource monitor
sudo pacman -S nvtop btop
MPV for Streams
Watch YouTube/Twitch without browser overhead:
sudo pacman -S mpv yt-dlpUsage:
mpv "https://youtube.com/watch?v=..."
mpv "https://twitch.tv/..."
Optional: Windows VM (Anti-Cheat Games)
For games that absolutely won't run (kernel-level anti-cheat like Valorant/R6S):
# Virtualization stack
sudo pacman -S qemu-desktop libvirt dnsmasq virt-manager edk2-ovmf swtpm dmidecode

# Enable libvirt service
sudo systemctl enable --now libvirtd.service
Configuring network:
# /etc/libvirt/network.conf
firewall_backend=iptables
Add to kernel params: intel_iommu=on
(GPU passthrough deserves its own guide)
Performance Tips
Launch options:
- AAA single-player:
mangohud gamemoderun %command% - Competitive:
gamemoderun %command%(no overlay) - Debugging:
mangohud PROTON_LOG=1 %command%
Shader cache: Keep enabled in nvidia-settings
Proton versions: Check ProtonDB.com for game-specific recommendations
Anti-cheat: Check areweanticheatyet.com before buying
The Result
Better FPS than Windows for many titles. No joke. Proton is that good, and NVIDIA on Wayland is smooth as butter.
When Windows gamers ask "Can you really game on Linux?" — show them your setup. When they see 120fps on Wayland with ray tracing, they'll understand.
Never Lose Your Config: Chezmoi
Spent days perfecting your setup? Don't lose it. Chezmoi makes your entire config reproducible.
What is Chezmoi?
Dotfile manager that:
- Stores configs in Git
- Handles different machines (laptop vs desktop)
- Manages permissions and encryption
- Templates configs for per-machine differences
Install
Install
sudo pacman -S chezmoi gitInitialize
First time:
chezmoi init
# Creates ~/.local/share/chezmoi
New machine (existing repo):
chezmoi init --apply https://github.com/yourusername/dotfiles.gitAdd Configs
Don't add files manually. Use the CLI:
# Add directories recursively
chezmoi add ~/.config/hypr
chezmoi add ~/.config/nvim
chezmoi add ~/.config/kitty
chezmoi add ~/.config/fish
chezmoi add ~/.config/quickshell
Edit Managed Files
Wrong:
nvim ~/.config/hypr/hyprland.conf # WARNING: Changes will be overwritten by chezmoi!Right:
# Edit the source file and apply changes upon saving
chezmoi edit --apply ~/.config/hypr/hyprland.conf
Sync to Git
# Option 1: Standard Git workflow
chezmoi cd
git add .
git commit -m "Updated Hyprland config"
git push
exit

# Option 2: Chezmoi internal command (Faster)
chezmoi git add .
chezmoi git commit -m "Updated configs"
chezmoi git push
Update from Git
On another machine:
# Pull changes from remote and apply them
chezmoi update
My Workflow
- Make changes directly to local files
- Add to chezmoi (update source):
chezmoi re-add ~/.config/hypr/hyprland.conf - Commit and push:
chezmoi git add .
chezmoi git commit -m "Updated keybindings"
chezmoi git push
Package List Backup
pacman -Qqe > ~/dotfiles/pkglist.txt
chezmoi add ~/dotfiles/pkglist.txt
Fresh install:
sudo pacman -S --needed - < ~/dotfiles/pkglist.txtQuick Reference
chezmoi status          # What's changed
chezmoi diff            # Preview changes
chezmoi apply           # Apply everything
chezmoi edit --apply <file>  # Edit and apply
chezmoi update          # Pull from Git and apply
chezmoi cd              # Jump to source directory
The Result
Entire desktop environment:
- ✅ Version controlled
- ✅ Reproducible
- ✅ Documented
- ✅ Portable across machines
Reinstall Arch, run one command, back up in minutes.
Squeeze Every Drop of Performance
These tweaks make the system faster, more responsive, and more efficient.
Compilation Optimization
Speed up AUR builds:
Compilation Optimization
Speed up AUR builds (makepkg):
# Edit makepkg config
sudo nvim /etc/makepkg.conf
Set these variables to utilize all CPU cores and optimize binaries:
# /etc/makepkg.conf

# Use all available cores for compilation
MAKEFLAGS="-j$(nproc)"

# Optimize for your specific CPU architecture
CFLAGS="-march=native -O2 -pipe -fno-plt"
CXXFLAGS="${CFLAGS}"

# Use multi-threaded compression for packages
COMPRESSZST=(zstd -c -T0 --ultra -20 -)
AUR packages now build much faster.
Network: BBR Congestion Control
Google's TCP algorithm. Significantly better for high-speed networks.
# 1. Enable BBR kernel module
echo "tcp_bbr" | sudo tee /etc/modules-load.d/bbr.conf

# 2. Configure network stack
# Create /etc/sysctl.d/99-network.conf
sudo tee /etc/sysctl.d/99-network.conf << EOF
# BBR Congestion Control
net.core.default_qdisc = fq
net.ipv4.tcp_congestion_control = bbr

# TCP Buffer Optimization (Increase limits for high speed)
net.core.rmem_max = 134217728
net.core.wmem_max = 134217728
net.ipv4.tcp_rmem = 4096 87380 134217728
net.ipv4.tcp_wmem = 4096 65536 134217728

# TCP Performance Tweaks
net.ipv4.tcp_window_scaling = 1
net.ipv4.tcp_timestamps = 1
net.ipv4.tcp_sack = 1
net.ipv4.tcp_no_metrics_save = 1
net.ipv4.tcp_moderate_rcvbuf = 1

# Network Stack
net.core.netdev_max_backlog = 5000
net.ipv4.tcp_slow_start_after_idle = 0
net.ipv4.tcp_mtu_probing = 1
EOF

# 3. Apply changes
sudo sysctl --system
Verify:
sysctl net.ipv4.tcp_congestion_control
# Should output: net.ipv4.tcp_congestion_control = bbr
ZRAM Tuning
Faster than disk swap, crucial for responsiveness.
# Install ZRAM generator
sudo pacman -S zram-generator
Configure /etc/systemd/zram-generator.conf:
[zram0]
# Use half of RAM or 4GB, whichever is smaller
zram-size = min(ram / 2, 4096)
compression-algorithm = zstd
Restart to apply:
sudo systemctl daemon-reload
sudo systemctl restart systemd-zram-setup@zram0.service

# Verify ZRAM device exists
zramctl
System Tuning
# Virtual Memory tweaks
sudo tee /etc/sysctl.d/99-performance.conf << EOF
# Decrease swap usage preference
vm.swappiness = 10
# Preserve VFS caches
vm.vfs_cache_pressure = 50
# Write background bytes earlier
vm.dirty_ratio = 10
vm.dirty_background_ratio = 5
EOF

# Apply changes
sudo sysctl --system
I/O Scheduler
For NVMe/SSDs, use none (let the device handle it).
# Check current scheduler
cat /sys/block/nvme0n1/queue/scheduler
If it's not [none], add elevator=none to your kernel parameters.
Boot Optimization
Disable unused services to speed up boot:
# Check blame to see what's slow
systemd-analyze blame

# Examples:
# If you don't print, disable CUPS
sudo systemctl disable cups

# If you don't use Bluetooth, disable it
sudo systemctl disable bluetooth
Only disable what you actually don't use.
Microcode
Verify it's loading correctly (important for stability):
dmesg | grep microcode
# Should show "microcode updated early to..."
Security: Secure /boot
Protect your kernel images.
# Edit fstab
sudo nvim /etc/fstab
Change /boot options to restrict permissions:
# fstab entry example
UUID=XXXX-XXXX /boot vfat defaults,fmask=0177,dmask=0077 0 2
Remount to apply:
sudo mount -o remount /bootPower Management (Laptop)
# Install TLP
sudo pacman -S tlp
# Enable service
sudo systemctl enable --now tlp.service
Auto-tunes power settings based on AC/Battery state.
Audio Latency (Pro Audio)
Edit ~/.config/pipewire/pipewire.conf.d/99-lowlatency.conf (Create if needed):
context.properties = {
    default.clock.rate = 48000
    default.clock.quantum = 256
    default.clock.min-quantum = 256
    default.clock.max-quantum = 256
}
Restart PipeWire:
systemctl --user restart pipewireFor general use/gaming, defaults are usually fine.
Intel DSP Fix
Only if you have audio issues on newer Intel laptops:
echo "options snd_intel_dspcfg dsp_driver=3" | sudo tee /etc/modprobe.d/intel-dsp-fix.conf
sudo mkinitcpio -P
Verify Everything
systemd-analyze  # Total boot time
systemd-analyze critical-chain  # Visualization of boot process
The Result
My boot time: ~8 seconds from POST to desktop. Network: Noticeably faster downloads. System: Instant. Zero lag.
Final Checklist
# 1. Check portals (Screen sharing/File dialogs)
systemctl --user status xdg-desktop-portal-hyprland

# 2. Qt support (if needed)
paru -S hyprland-qt-support

# 3. Verify cursor theme env var
echo $XCURSOR_THEME

# 4. Check polkit agent running
ps aux | grep polkit
Everything should be green and working. You have a perfectly optimized Arch Linux system.
Quick Fixes & Improvements
Random fixes that make life easier.
Dolphin: Extract Here
Add context menu extraction:
# Install Ark (KDE Archiving Tool)
sudo pacman -S ark
Fix open with app
supo pacman -S archlinux-xdg-menu Phone as Webcam
Use your Android/iOS device as a high-quality webcam:
# Install DroidCam
paru -S droidcam

# Load Video4Linux2 kernel module
sudo modprobe v4l2loopback exclusive_caps=1 card_label="Integrated Camera"
CLI Trash
Safer than rm:
# Install trashy (Rust-based trash-cli)
paru -S trashy
# Usage: trash put file.txt
YAZI: EXIF Support
Enable metadata previews in Yazi:
sudo pacman -S perl-image-exiftoolQuickShell: Syntax Highlighting
# Required for code block highlighting in QuickShell
sudo pacman -S syntax-highlighting
Done. These small fixes add up to a much better experience.
Conclusion: You Did It
If you’ve made it this far, you have:
✅ A blazing fast Arch Linux system
✅ NVIDIA working perfectly on Wayland
✅ Beautiful Hyprland desktop environment
✅ Optimized for gaming with Proton and all the tools
✅ Reproducible configuration with chezmoi
✅ Security hardened with UFW and sandboxed apps
✅ Performance tuned for maximum responsiveness
This setup is the result of countless hours of research, testing, and refinement. But now it’s yours, and you understand every piece of it.
What’s Next?
Keep learning. The Arch Wiki is an endless treasure trove. Read it.
Resources
Official Documentation:
Community:
References:
Final Thoughts
Linux is about freedom and control. You’re not at the mercy of Microsoft’s updates or Apple’s walled garden. You built this system. You understand it. You control it.
When Windows gamers ask “Can you really game on Linux?” — show them your setup.
I use Arch, btw.